
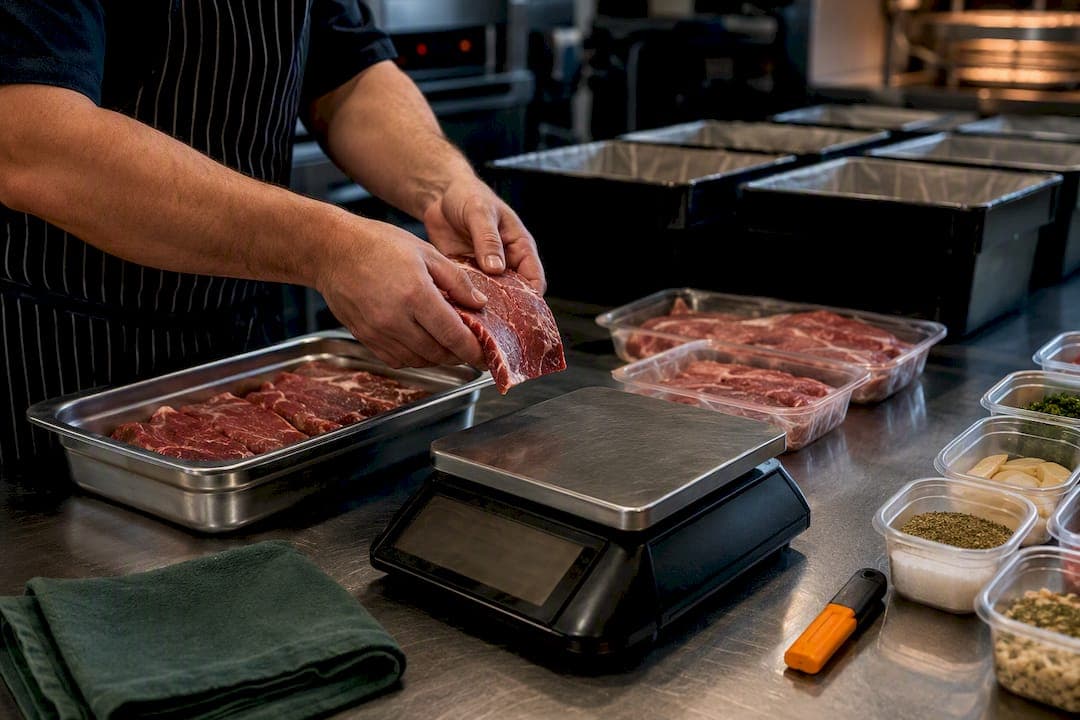
Recipe yield conversion is the process of turning net recipe requirements into purchase order quantities by dividing by your yield factor, then rounding to supplier pack sizes. The short workflow is: calculate net requirement per portion, aggregate across your menu, divide by yield, convert to purchase units, add a buffer, then draft your PO. Cost-control frameworks used across commercial kitchens build on this same five-step chain.
TL;DR:
- Standardizing recipe units to grams, milliliters, or individual items prevents downstream ordering errors caused by vague measurements.
- Dividing the total edible requirement by the yield factor determines the purchase weight, which must be rounded up to full pack sizes to avoid shortages.
- Mismatched pack sizes or minimum order quantities often lead to miscalculations, requiring conversion to full packs before creating purchase orders.
- Regular weekly and monthly reviews of yield percentages, waste logs, and variance thresholds ensure ongoing accuracy and cost management.
- Using automation platforms that link recipes to inventory, yield factors, and supplier pack sizes significantly reduces manual work and improves order precision.
Table of Contents
- How Do You Convert Recipe Yields Into Purchase Orders?
- What Are the Key Formulas for Recipe Yield Conversion?
- What Mistakes Cause Recipe Yield Conversion Errors?
- How Often Should You Review Yield Factors?
- Why Recipe-Linked Inventory Has Become Mission-Critical
- Automate the Recipe-to-Purchase-Order Chain With PantryHub
- Sources
- FAQ
How Do You Convert Recipe Yields Into Purchase Orders?
Every ordering cycle runs on the same chain of tasks. Skip one, and your purchase order will not match what actually lands in the walk-in.
1. Standardize recipe units first. Every recipe should specify grams, milliliters, or "each," never vague terms like "a handful" or "one bunch." Map each of those units to a specific inventory SKU so the recipe and your stock system are speaking the same language from day one. This single fix prevents the majority of downstream ordering errors, since a mismatched unit at the recipe stage compounds every time you scale it.
2. Compute net requirement per menu item. Multiply expected portions (from covers, forecasts, or bookings) by the ingredient amount per serving. A braised short rib special selling 40 covers at 220 grams of trimmed meat per plate needs 8.8 kilograms of edible product, full stop.
3. Aggregate across the menu. If chicken thigh appears in three dishes, add up every recipe's net requirement into one combined figure before you touch a supplier catalog. Working item by item instead of ingredient by ingredient is how kitchens double-order some things and run out of others in the same week.
4. Apply your yield factor. Divide the net (edible) requirement by the yield percentage to get the purchase weight. Working through every menu item this way means multiplying portions by amount per serving, totaling by ingredient, and dividing by yield rather than by loss percentage, which is where a lot of spreadsheets get the math backward.
5. Convert to supplier pack units. Round up to match how your supplier sells the item. Respect minimum order quantities (MOQs) and standard pack sizes; ordering 8.8 kilograms of something sold in 5 kilogram boxes means you are buying two boxes, not 1.76.

6. Add a buffer and group your draft PO. Layer in a safety margin for prep variance and unexpected covers, then group everything by supplier so your purchasing person sends one clean order instead of five scattered ones.
What Are the Key Formulas for Recipe Yield Conversion?
Two formulas run this entire system. Learn them once and every recipe, no matter how complex, reduces to the same arithmetic.
- Net requirement = portions × ingredient quantity per portion
- Purchase quantity = net requirement ÷ yield factor (expressed as a decimal, so 55% yield is 0.55)
Recipe costing depends on the same three inputs: portion size in grams or ounces, a costed ingredient unit, and an accurate yield percentage. Get one of those three wrong and your food cost percentage drifts without anyone noticing until the P&L lands.
A note on rounding: always round purchase quantities up to the nearest full pack, never down. Rounding down to save money on paper creates a shortfall on the line, which costs far more in rush deliveries or substitutions.
Worked example A: whole salmon for a portioned entrée. You need 15 kilograms of trimmed, edible salmon for the week's covers. Fifteen divided by 0.55 gives you 27.3 kilograms of whole fish to purchase, a ratio confirmed in KitchenNmbrs's own worked example. Round to 28 kilograms or whatever your fishmonger's standard weight bracket allows.
Worked example B: cooking oil across multiple prep stations. Three recipes call for 1.2 liters, 800 milliliters, and 2.5 liters of oil respectively, totaling 4.5 liters net. Oil has no yield loss, so the purchase quantity equals the net figure. Your supplier sells 5 liter tins, so you order one tin, leaving 500 milliliters of buffer that rolls into next week's count.
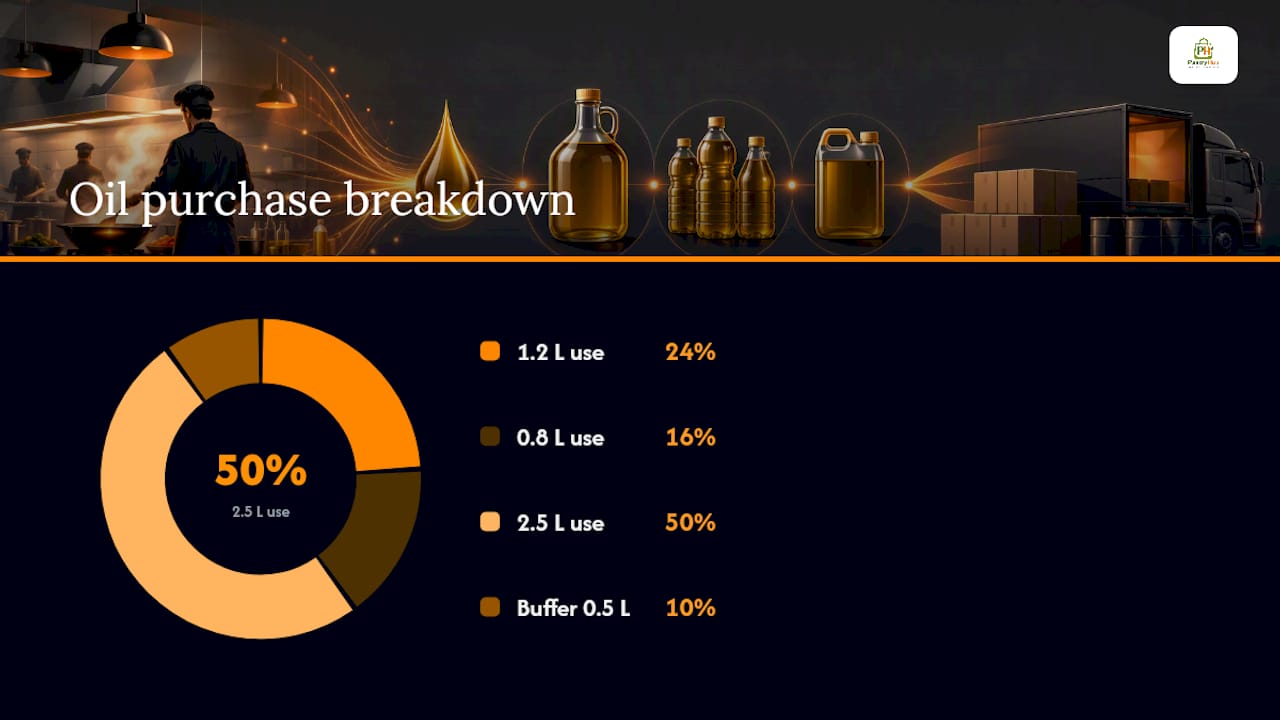
Quick reference: 1,000 grams = 1 kilogram; 1,000 milliliters = 1 liter; most protein comes in 5 kg or 10 kg case packs; oils and sauces typically run in 2 L, 5 L, or 20 L formats depending on supplier.
What Mistakes Cause Recipe Yield Conversion Errors?
Most yield conversion failures trace back to five repeatable mistakes, and every one of them has a fast fix.
- Ambiguous recipe units. A recipe written in cups or "pieces" instead of grams or milliliters cannot map cleanly to a purchase quantity. Fix: mandate grams, milliliters, or each at the point of recipe creation, no exceptions.
- Confusing raw weight with edible portion (EP). Ordering based on plate weight instead of calculating true EP yield for proteins and other high-shrink items leads to chronic underordering. Fix: calculate and record EP yield percentages for every high-cost protein and vegetable that loses significant trim.
- Pack-size and MOQ mismatches. Calculating an exact net figure and ordering that exact number ignores how suppliers actually sell product. Fix: always convert to full pack units before the PO goes out the door.
- No variance checks. Without comparing weekly receipts against expected usage, small errors compound silently for months. Fix: set a variance threshold (many kitchens use 5 to 10%) that triggers an investigation the moment actual usage drifts from forecast.
- Static yields that never get revisited. A yield factor calculated once during onboarding and never touched again drifts out of accuracy as suppliers, cuts, and seasons change.
Pro Tip: Keep a standing rounding policy on paper. "Always round up to the nearest full pack, add a safety buffer on proteins and dry goods to remove guesswork from every purchaser on your team, not just the one who set up the system.
How Often Should You Review Yield Factors?
Yield factors are only as good as the last time someone checked them against reality. Left alone, they become quietly wrong, and that quiet is expensive.
- Daily: a quick visual check on prep loss against expected yield for the day's high-cost proteins, done by whoever runs that station.
- Weekly: the kitchen lead reviews actual trim and waste logs against recorded yield percentages, and the purchaser cross-checks vendor price lists so recipe costs stay current.
- Monthly: the manager reviews variance percentage, inventory turnover, and cost-per-portion drift across the full menu, approving any yield adjustments the kitchen lead has flagged.
Kitchen leads own the recipe yields and the trim data that feeds them. Purchasing owns supplier pack sizes and MOQ mapping. Managers own the variance thresholds and sign off on buffer policy changes. When one person quietly does all three jobs, updates stop happening the moment that person gets busy, which is most weeks.
Update your inventory records the same day a yield changes, and lock the approved figure so it does not get overwritten by an outdated recipe card sitting in a binder somewhere.
Why Recipe-Linked Inventory Has Become Mission-Critical
Every kitchen that has ever run short on a Friday dinner rush already knows what a broken yield calculation costs. Recipe-linked inventory closes that gap by keeping yields, pack sizes, and supplier SKUs in one place instead of scattered across recipe cards, spreadsheets, and someone's memory.
The operational case is straightforward: tighter yield tracking reduces waste, speeds up ordering, and keeps cost-per-portion honest against your menu pricing. Platforms that store this data centrally remove the repeated manual conversion work that eats a purchaser's Tuesday morning. The PantryHub blog covers this territory regularly, from ingredient-level stock tracking to broader cost control strategy, and this piece draws on that same operational thinking.
— Admin
Automate the Recipe-to-Purchase-Order Chain With PantryHub
Manually recalculating yields, pack sizes, and supplier SKUs for every menu item is the exact workload that eats a manager's week without ever showing up on a P&L line. Some hospitality inventory platforms are built to remove that specific burden: recipes link directly to inventory SKUs, yield factors stay stored against each ingredient, and pack-size conversions happen automatically instead of on a sticky note by the walk-in.
That connection between recipe and stock means fewer stockouts on high-turnover proteins, faster ordering cycles because draft POs group by supplier automatically, and a live picture of cost-per-portion instead of a monthly surprise. It runs from your desktop or on shift through the kitchen inventory app, so whoever is receiving stock can confirm quantities against the PO in real time.
If your kitchen is still converting yields by hand every ordering cycle, the PantryHub hospitality inventory platform is built to take that specific task off your plate. Check the pricing tiers and start a free trial to see how it maps to your current menu.
Sources
For worked examples and feature detail, see KitchenNmbrs on portion-based stock calculation, RevenueHawk's recipe costing guide, and Ordering.
- How do I calculate how much stock I need per week based on portion sizes and expected covers | KitchenNmbrs
- The Step-by-Step Guide to Accurate Restaurant Recipe Costing
FAQ
What Is a Yield Factor in Recipe Costing?
A yield factor is the percentage of usable product left after trimming, cooking, or prep loss, calculated by dividing edible product weight by raw purchase weight.
How Do I Calculate Purchase Quantity From Net Recipe Requirements?
Divide your net (edible) requirement by the yield factor as a decimal, then round up to the nearest full supplier pack size.
Why Does My Purchase Order Never Match My Recipe Calculations?
The most common cause is a pack-size or MOQ mismatch, where the calculated net quantity does not align with how your supplier actually sells the product; always convert to full packs before finalizing the order.
How Often Should Yield Factors Be Updated?
Review yields weekly against actual trim and waste logs, and revisit them monthly at a management level whenever variance, turnover, or cost-per-portion drift flags a problem.
Can Software Automate Recipe Yield Conversion?
Yes. Platforms like PantryHub store yield factors and supplier pack sizes against each recipe ingredient, so purchase quantities and draft POs calculate automatically instead of by hand each cycle.