
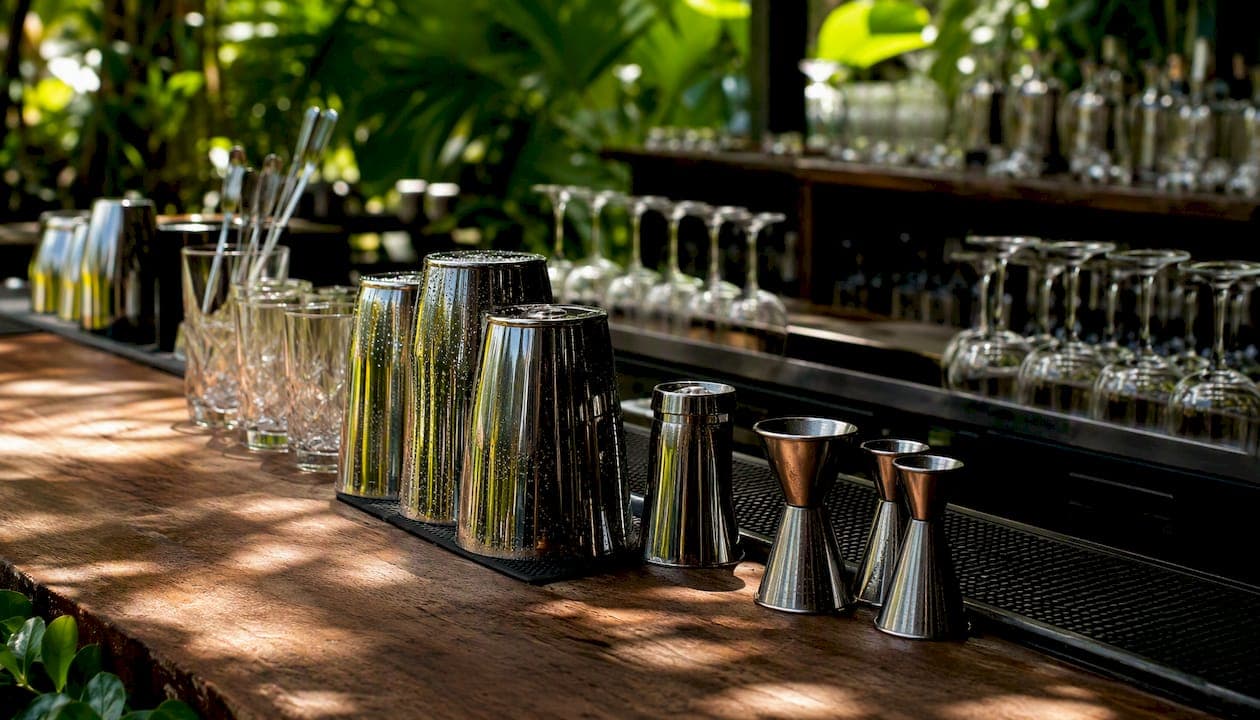
If you're setting up a home bar, your must-have kit is a Boston shaker set, jigger, Hawthorne strainer, bar spoon, muddler, channel knife, and a set of pourers. If you're opening a commercial bar, your commercial starter list expands to include refrigeration, an ice machine, underbar sinks, a glass washer, glassware stock, and your core smallware kit. Get those categories right first. Everything else is a refinement.
Home bar must-haves (6–8 items):
- Boston shaker set (two-piece tin or tin-on-glass)
- Jigger (dual-sided, 1 oz / 2 oz)
- Hawthorne strainer
- Bar spoon (twisted handle, 12-inch)
- Muddler (hardwood or stainless)
- Channel knife / Y-peeler
- Pourers (a few for spirits you use regularly)
- Mixing glass (optional but useful for stirred drinks)
Commercial starter set (8–10 core pieces):
- Weighted shaker tins (multiple sets per bartender)
- Slim jiggers (several per station)
- Hawthorne and Julep strainers
- Bar spoons (a couple per station)
- Speed pourers (one per open bottle)
- Back-bar refrigeration unit
- Ice machine (sized to peak-hour demand)
- Underbar sink (multi-compartment)
- Glass washer
- Glassware stock (adequate quantity as needed)
Pro Tip: Buy your smallware first and buy it right. Weighted tins and slim jiggers are the tools that directly affect speed and consistency behind the bar. Skimping here costs you more in slow service and staff fatigue than the price difference ever saves.
Key Takeaways
The most important decision in any bar equipment purchase is matching capacity to peak-hour demand before committing to a budget or a brand.
| Point | Details |
|---|---|
| Size for peak, not average | Ice machines, refrigeration, and glassware stock should cover peak-hour demand plus a significant buffer. |
| Invest in smallware first | Weighted tins and slim jiggers directly affect speed and consistency; buy spares before opening day. |
| Certifications protect your license | NSF-certified equipment is required for food-contact surfaces in most U.S. commercial bar setups. |
| Confirm lead times before signing | Custom underbar and refrigeration units can take 6–12 weeks; plan procurement before your lease start. |
| Automate inventory from day one | Pantryhub tracks real-time stock levels and automates reorder alerts, protecting margins from the first service. |
Table of Contents
- What bar equipment do you actually need? A side-by-side shopping shortlist
- How do you choose the right bar equipment for your setup?
- Which smallware tools drive speed and consistency behind the bar?
- How much glassware do you need, and what types should you stock?
- How do you size and choose back-bar refrigeration?
- What size ice machine do you need, and how do you maintain it?
- How do you set up a draft tap system that actually works?
- When should you invest in a commercial blender or juicer?
- How should you lay out your bar for maximum speed?
- What does a bar sanitation schedule actually look like?
- Top picks and best sellers by category
- What do pro bartenders actually prioritize when buying equipment?
- What buyers wish they'd known before purchasing bar equipment
- Pantryhub keeps your bar stocked without the spreadsheet chaos
- Sources
What bar equipment do you actually need? A side-by-side shopping shortlist
Before you spend anything, map your purchases to your service model. A home bartender and a 60-seat cocktail bar have almost nothing in common when it comes to capacity, certification, or budget. The table below cuts through that gap fast.
Price tiers at a glance:
- Entry / home: an affordable complete kit price; glassware under $2 per piece
- Mid / semi-pro: a mid-range price for quality tools and glassware
- Pro / commercial: a substantial investment range for refrigeration, ice machines, and tap systems combined
The one rule that applies across every category: never skimp on the tools your bartenders touch every shift. Smallware wears out faster than refrigeration, and a poorly weighted tin or a jigger that drips costs you in speed and accuracy every single service.
How do you choose the right bar equipment for your setup?
Start with capacity, then work backward to budget and installation. That sequence prevents the most common buying mistake: choosing a unit that looks right on paper but can't handle peak-hour demand.
The decision flow
- Estimate your peak-hour volume. How many covers, how many drinks per hour, and how many bartenders are working simultaneously?
- Map your space. Measure your underbar depth (typically 24 inches), ceiling height for upright units, and drain and power access points before ordering anything.
- Set a realistic budget. Commercial refrigeration and ice machines are the biggest capital items. Budget for installation on top of the unit price — electrical and plumbing work often adds 15–30% to the equipment cost.
- Check energy and utility constraints. Many commercial units require 208–240V dedicated circuits. Confirm your panel capacity before specifying equipment.
- Confirm certification requirements. Health departments in most U.S. jurisdictions require NSF-certified equipment for any surface that contacts food or beverages. UL certification covers electrical safety. Both matter for your operating permit.
- Ask about lead times. Custom underbar equipment can take 6–12 weeks. Stock units from major distributors typically ship in 1–3 weeks.
Questions to ask your supplier or installer
- Does this unit require a dedicated circuit, and what amperage?
- Is a floor drain or condensate drain required, and where does it need to be located?
- What is the installation lead time, and do you provide startup service?
- What does the warranty cover — parts only, or parts and labor?
- Is this unit NSF-certified for the specific use I'm specifying it for?
- What is the recommended service interval, and who is the authorized service provider in my area?
- Are replacement parts stocked locally, or are they special-order?
A bar and restaurant POS with inventory features, combined with dedicated bar inventory software, is as important as the physical equipment list. Tracking what you pour and what you reorder is how you protect margins from the day you open.
Which smallware tools drive speed and consistency behind the bar?
Weighted tins and slim jiggers are the two items that most directly affect how fast and accurately your bartenders work. Everything else matters, but those two are where the money shows up in service speed.
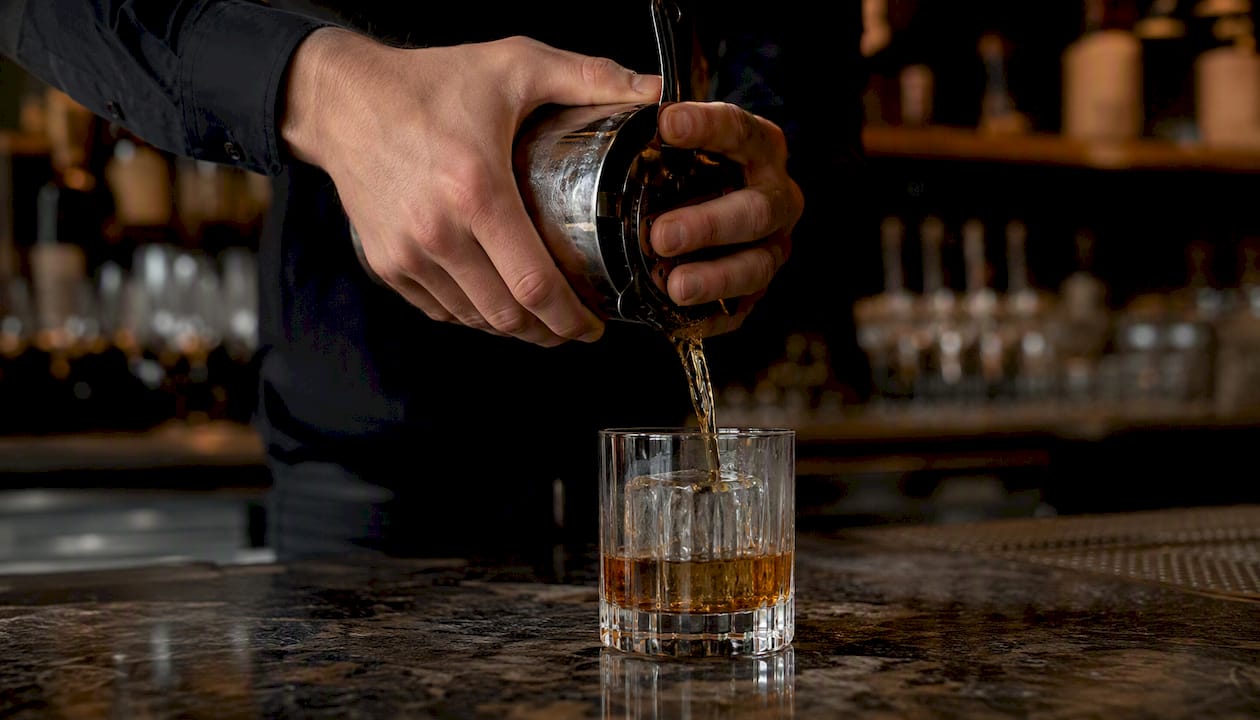
Professional barware manufacturers design commercial lines specifically around the conditions of high-volume service: repeated drops, constant washing, and the need for a reliable seal and clean release every time. A Boston shaker that sticks mid-service or a jigger that drips between pours adds up to lost seconds on every drink.
What makes a tool professional-grade?
Material: 18/8 stainless steel (also labeled 304 stainless) resists corrosion and holds up to commercial dishwashing. Avoid chrome-plated tools — the plating chips over time.
Weight and balance: Weighted tins sit better in the hand and release more predictably. The Koriko line from Cocktail Kingdom is a benchmark here — the weighted design and tight tolerances have made it a standard in pro kits across the U.S.
Jigger profile: Slim, tall jiggers pour faster and more accurately than wide bell-shaped ones. Leopold jiggers are a good example of the high-quality finish and precision that cocktail-focused bars look for.
Sets vs. individual pieces: For a home bar, a curated set from a retailer like Cocktail Kingdom covers most needs in one purchase. For a commercial bar, buy individual pieces in quantity — you need spares.
How many of each to stock:
- Shaker tins: 2 sets per bartender, plus 2 backup sets per station
- Jiggers: multiple per station
- Strainers (Hawthorne): 1–2 per station
- Bar spoons: 2 per station
- Muddlers: 1 per station, 1 backup
Pro Tip: Order extra smallware than initially estimated before opening. Tins walk, jiggers get dropped, and strainers disappear. Running short during a Friday service is a problem you can solve in advance for under $50.
How much glassware do you need, and what types should you stock?
The rule of thumb for a table-service bar: stock several times your seat count in primary glass types. For a fast-turnover bar or nightclub, increase that for fast-turnover bars. You need enough glasses in rotation to cover what's on tables, what's in the glass washer, and what's on the shelf — simultaneously.
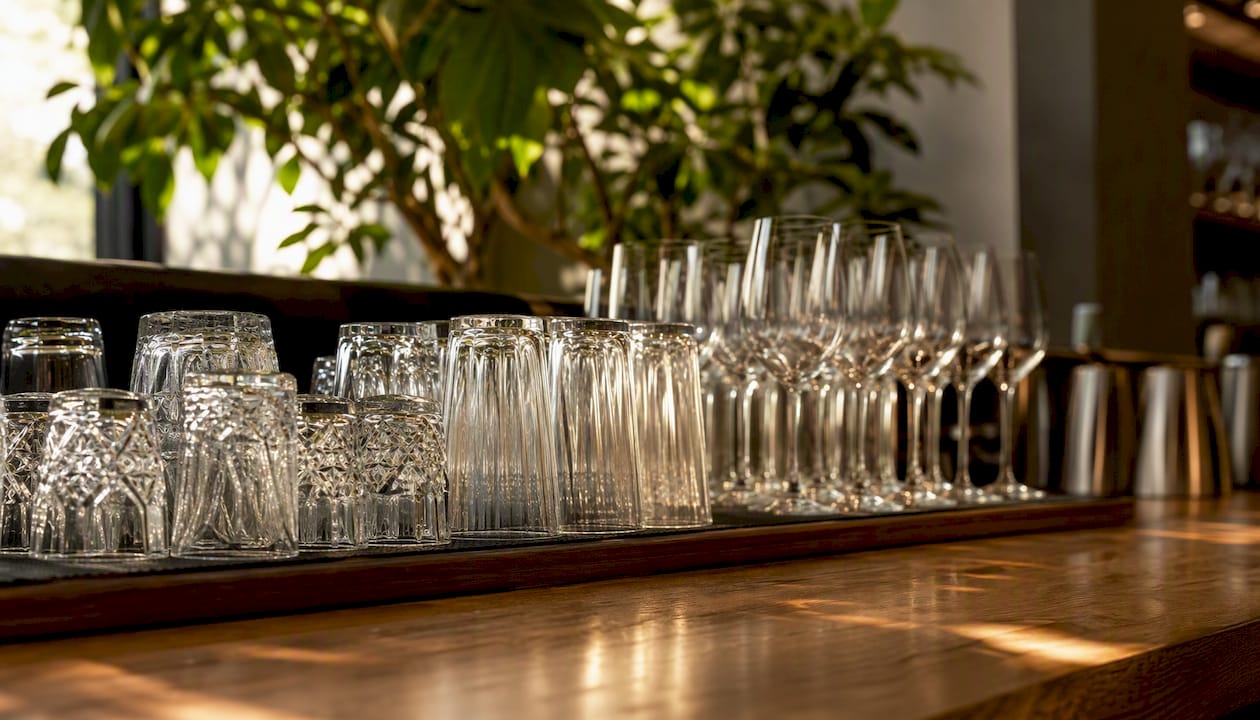
Bar supply retailers offer glassware in ranges from under $1 per piece for house-brand tempered stock to $8+ for premium crystal. For a commercial bar, tempered glass is the practical choice: it's more resistant to thermal shock and chips less visibly than standard glass.
Glass types by drink category
- Rocks / Old Fashioned (8–12 oz): For spirits neat, on the rocks, and short cocktails
- Highball (10–16 oz): For long drinks, sodas, and beer cocktails
- Coupe / Martini (5–8 oz): For up cocktails and champagne service
- Wine (12–20 oz): Red, white, and sparkling — consider a single all-purpose wine glass to simplify stock
- Pint / shaker glass (16 oz): For draft beer and casual service
- Shot glass (1–2 oz): Stock generously; they break and disappear constantly
Storage and cleaning
Stemware hangs best on overhead glass racks — it keeps rims off surfaces and speeds up service. Rocks and highball glasses stack in speed racks or on rubber-matted shelves. Keep glassware away from heat sources and direct sunlight to reduce thermal stress.
For cleaning, a commercial glass washer cycles in 90–120 seconds per rack and is non-negotiable for any bar doing more than 50 covers a night. Manual three-compartment sink washing works for low-volume setups but slows service significantly at scale.
Pro Tip: Choose one stackable rocks glass and one stackable highball as your house glass. Stackable profiles save shelf space and reduce breakage during stacking — a detail that matters when you're storing 200+ glasses in a tight underbar.
How do you size and choose back-bar refrigeration?
The choice between undercounter and upright back-bar units comes down to workflow, not preference. If your bartenders need to access bottles and garnishes constantly, an undercounter unit keeps everything at hand. If you're storing high-volume beverage stock that gets restocked between shifts, an upright back-bar unit holds more and is easier to load.
Commercial bar equipment retailers organize refrigeration by function: back-bar coolers, reach-in units, and glass frosters. True is one of the most recognized names in this category — their back-bar units are specified regularly in commercial builds for their build quality and compressor reliability.
Sizing your cooler
A rough capacity guide:
- Under 50 seats: 1–2 undercounter units (5–9 cu ft each) typically cover beverage and garnish storage
- 50–150 seats: Add a full-size back-bar upright (20–23 cu ft) for bottle storage, plus undercounters at each station
- 150+ seats: Multiple uprights plus dedicated keg coolers and possibly a walk-in
Energy and warranty factors to check:
- Look for ENERGY STAR-rated units — they use less electricity and often qualify for utility rebates
- Compressor warranties of several years lifespan are standard for commercial-grade units; anything shorter is a risk signal
- NSF/7 certification covers refrigerated storage for food and beverages — required in most U.S. health codes
Installation notes: Back-bar refrigeration needs adequate ventilation clearance (typically 3–6 inches on sides and rear for forced-air units). Confirm drain access before finalizing placement. Lead times for custom or stainless-finish units can run 4–8 weeks.
What size ice machine do you need, and how do you maintain it?
Size your ice machine for your peak-hour ice consumption plus a significant buffer. Underestimating ice is one of the most common and most disruptive mistakes in a bar opening — running out of ice at 9 PM on a Saturday is not recoverable.
A commercial starter setup always includes ice production and storage as a core line item. Ice machines are rated by daily output (pounds per 24 hours), but your real constraint is the storage bin — the machine makes ice continuously, but the bin is what you draw from during service.
Ice types and their uses
- Full cube / half cube: Standard for spirits and mixed drinks; slow melt, clear appearance
- Nugget / pellet ice: Chews easily, absorbs flavor — popular for soft drinks and some cocktails
- Flake ice: Ideal for seafood displays and blended drinks; melts faster, not ideal for spirits service
- Clear / gourmet cube: Slow-melt, premium presentation for craft cocktail bars
Maintenance schedule
- Daily: Wipe down exterior, check bin for debris, verify temperature
- Weekly: Clean and sanitize bin interior, check water filter
- Quarterly: Descale with manufacturer-approved cleaner, inspect water lines and drain
- Annually: Full service by a certified technician
NSF-certified ice machines are required in most U.S. commercial food service environments. Water filtration is strongly recommended — hard water accelerates scale buildup and shortens machine life significantly.
Pro Tip: Install your ice machine on a dedicated water line with an inline filter. The filter costs typical service cost range and can double the interval between descaling services — a real operating cost saving over a machine's lifetime.
How do you set up a draft tap system that actually works?
The number of taps you need depends on projected pours per hour, not on how many beers you want to offer. A single-tap system serving 20 pints per hour is a different animal from a 12-tap wall doing 200 pints. Start with the volume, then size the system.
Tap count guidance:
- few taps: Kegerator or basic direct-draw system; suits low-volume bars and home setups
- moderate number of taps: Standard commercial bar; requires a glycol cooling system for longer line runs
- large numbers of taps: High-volume or craft beer bar; needs dedicated glycol trunk lines and regular professional servicing
Coupler types
The coupler connects the keg to the line. The most common U.S. type is the D-system (American Sankey), which covers most domestic and many import lagers. European imports often use S-system (Heineken, Stella) or G-system (Bass, Guinness). Stocking the wrong coupler means a keg you can't tap — confirm before ordering.
Cleaning schedule and costs:
- Lines should be cleaned every 2 weeks with a food-grade line cleaner and sanitizer
- A basic line-cleaning kit runs a moderate price range; professional cleaning services charge typical service cost range per visit
- Neglected lines produce off-flavor beer and are a health code violation in most states
Cost estimates:
- Basic single-tap kegerator: a base price range
- 4-tap commercial direct-draw system: a medium commercial price range
- 8-tap glycol system with trunk line: a high-end commercial price range
When should you invest in a commercial blender or juicer?
Invest in commercial-grade units the moment frozen cocktails or fresh juice appear on your menu as regular items. A consumer blender running continuous frozen margarita service will fail within weeks. The motor wattage and duty cycle are what separate commercial from consumer — not the brand name on the side.
Vita-Mix commercial blenders are the benchmark for continuous-duty frozen drink production. Their high-wattage motors and long duty cycles handle the kind of workload that destroys consumer units in a season. For a bar running a frozen cocktail program, the price difference between a consumer and commercial blender pays back in avoided replacement costs alone.
Maintenance notes: Commercial blenders should be rinsed immediately after each use and fully cleaned at the end of each shift. Most commercial jars are not dishwasher-safe — check the manufacturer spec before putting them in the machine.
Pro Tip: If you're running a frozen drink program, buy two blenders. One unit down during service with a queue of margarita orders is a painful lesson in redundancy planning.
How should you lay out your bar for maximum speed?
The core ergonomic principle: minimize the steps between ice, glassware, the speed rail, and your POS terminal. Every extra step a bartender takes per drink adds up to dozens of minutes of lost service time per shift. Modular underbar equipment exists specifically to solve this — compact, configurable units that put everything within arm's reach.
Layout checklist:
- Speed rail positioned directly below the primary work surface, within easy reach without bending
- Ice bin centered between the two primary work zones (or one per station in a long bar)
- Glass washer at the end of the bar, away from the primary build zone to avoid congestion
- POS terminal at the far end of the bar or on a swing arm — not in the middle of the build zone
- Foot rail at 8–10 inches from the floor, 12–14 inches out from the bar face
- Service aisle minimum 36 inches wide; 42 inches preferred for two-bartender stations
Installation notes:
- Speed rails should be bolted, not just hung — a rail that shifts under load is a safety issue
- Stainless steel or chrome-plated steel rails hold up to cleaning chemicals; avoid painted finishes in wet zones
- Underbar sinks require a licensed plumber for drain and supply connections in most U.S. jurisdictions
What does a bar sanitation schedule actually look like?
Health codes in the U.S. require specific sanitation practices for any commercial food service operation, and bars are no exception. NSF-certified equipment is the baseline — it signals that a unit's materials and design meet food-contact safety standards.
Daily sanitation checklist:
- Wipe down all bar surfaces with an approved food-contact sanitizer
- Run the glass washer through a full cleaning cycle at end of service
- Empty and clean ice bins if any debris or contamination is present
- Clean and sanitize speed rails and bottle holders
- Dispose of garnishes and perishables; clean garnish trays
Weekly:
- Deep-clean glass washer (check spray arms, clean filter basket)
- Sanitize ice machine bin
- Clean draft lines (every 2 weeks minimum)
Disposables for events and high-breakage environments:
- Plastic or compostable cups (16 oz, 12 oz)
- Cocktail stirrers and straws
- Garnish picks and skewers
- Cocktail napkins
Safety callouts:
- All electrical equipment near water must be properly grounded — confirm with your electrician
- Hot glass washers and steam from underbar equipment are burn hazards; post safety signage
- Request NSF certification documentation from your supplier before accepting any food-contact equipment
Top picks and best sellers by category
Here's how the leading brands and product lines stack up across the categories that matter most to buyers right now. Cocktail Kingdom's barware catalog and major trade suppliers like WebstaurantStore and Bar Products are the primary retail channels for most of these.
Who each pick suits:
Koriko tins are the default choice for any bar where speed and release consistency matter. The weighted design is the reason they appear in pro kits from New York to Los Angeles.
Leopold's precision finish makes it the right call for a craft cocktail program where presentation and tool quality are part of the brand. The jiggers in particular are a step above standard commercial options.
True refrigeration units are specified in commercial builds because their compressors are reliable and their NSF/UL certifications are standard. For a back-bar cooler that needs to run 18 hours a day without issue, True is a safe specification.
Vita-Mix is the commercial blender standard for a reason. If frozen drinks are on your menu, this is the unit that handles the workload without burning out.
BarConic covers high-volume glassware needs at a price point that makes sense for operations where breakage is constant. Their house collections through trade suppliers offer an extensive SKU range for novelty and standard glass types alike.
Trade catalogues increasingly show glass polishing machines and smart pourers as the next investment tier for larger operations — worth tracking if you're building out a premium venue.
What do pro bartenders actually prioritize when buying equipment?
Weight, fit, and repeatability. Those three words cover most of what separates a professional's equipment list from a hobbyist's.
That principle applies from shakers to refrigeration. Professional barware manufacturers build their commercial lines around the conditions of real service: repeated drops, constant washing, and the need for a reliable result every time. A tin that sticks, a jigger that drips, or a cooler that can't hold temperature during a Saturday rush are all the same problem: equipment that adds variables instead of removing them.
The practical tradeoffs pros navigate:
- Cost vs. uptime: A cheaper refrigeration unit that needs service every six months costs more in downtime and repair than a premium unit with a 5-year compressor warranty.
- Weight vs. comfort: Weighted tins are faster and more consistent, but bartenders working long shifts notice the difference. Some pros use lighter tins for stirred drinks and weighted for shaken — a small detail that reduces fatigue over a full service.
- Modular vs. fixed underbar: Modular underbar equipment costs more upfront but lets you reconfigure as your menu and volume change. Fixed builds are cheaper but lock you into a layout.
Pro Tip: Track your pour costs and reorder cycles from day one. Inventory software like Pantryhub gives you real-time stock visibility and automated low-stock alerts — so you're not running out of a key spirit mid-service or over-ordering and tying up cash in stock you don't need.
What buyers wish they'd known before purchasing bar equipment
The most common regret from bar operators isn't about brand choice. It's about quantity and lead time.
Ice is the one that catches almost everyone. A bar that looks perfectly sized on paper — right refrigeration, right glassware count, right smallware — runs short on ice within the first two weeks because the machine was sized to average demand, not peak demand. Sizing for peak plus a significant buffer isn't overcautious. It's the standard that experienced operators use.
The second regret: not ordering enough smallware spares before opening. Tins disappear. Jiggers get dropped and dented. Strainers walk. Ordering a second round of smallware two weeks into service, at retail price and with standard shipping, costs more than buying the spares upfront.
Two purchase regrets and how to avoid them:
- Underestimating ice capacity. Size your machine to peak-hour demand, not average. Add a secondary storage bin if your machine's built-in bin is under adequate storage capacity.
- Skipping installer lead-time confirmation. Custom underbar equipment and some refrigeration units have 6–12 week lead times. Confirm before you sign a lease or set an opening date.
One practical tip for warranties and service contracts: Ask your equipment supplier to include a startup service visit in the purchase price. Most will agree if you ask before signing. That visit catches installation issues before they become warranty claims — and it establishes a relationship with the service technician who'll be your first call when something breaks at 7 PM on a Friday.
Pantryhub keeps your bar stocked without the spreadsheet chaos
Once your physical bar equipment is in place, the next problem is keeping it running profitably. That means knowing what you have, what you're running low on, and what to reorder before you run out mid-service.
Pantryhub is built for exactly that. While the brands and tools in this guide cover what you buy, Pantryhub controls what you use and what you reorder. Real-time stock tracking, AI-powered low-stock alerts, and direct supplier ordering replace the manual stocktake spreadsheets that eat hours every week and still miss things. Whether you're managing a single bar or multiple venues, Pantryhub gives you complete visibility across your inventory from any device.
For bar operators who want to protect pour costs and stop over-ordering, start a free trial of Pantryhub and see how much cleaner your ordering process gets within the first week.
Sources
Trade suppliers and retailers:
- Barfly® Mixology Gear by Mercer
- Piña Barware • Professional Bar Tools for Professional Bartenders
- 7 Necessary Pieces of Commercial Equipment All Bars Need
- Commercial Bar Supplies & Equipment - WebstaurantStore
- BarSupplies: The Supply Super Store for Bar and Restaurant Supplies – Bar Supplies
- BARWARE & BAR TOOLS – Cocktail Kingdom
- Bar Equipment - Bar Products — Bar Products
- Barprofessional catalogue and product news